Home » 2024
Yearly Archives: 2024
The Essential Tasks of Professional Roofers
Roofers Denver also known as roofing mechanics or roofing contractors, specialize in roof construction. They replace, repair, and install the roofs of buildings using a variety of materials.

Small-business roofers are usually independently owned and operated. They typically have lower overhead and can offer competitive pricing. They can provide good customer service and may even have a dedicated salesperson.
Many people who live in tornado and hurricane-prone areas keep a close eye on the weather, keeping up with news reports and taking cover when a storm is on its way. But some take it a step further, becoming so obsessed that they follow severe weather patterns across the country, a hobby known as storm chasing. These amateur meteorologists, who are referred to as chasers, document and photograph the most dangerous weather conditions in search of an adrenaline rush.
As you might expect, it takes a lot of training and knowledge to become a storm chaser. The first step is to understand how a thunderstorm develops. Then you need to study maps and learn how to make your own forecasts. Some chasers even serve as a backup to meteorologists by providing them with information about the location of the storm.
Then comes the part where you have to decide whether or not to risk it all for the thrill of a close-up view of Mother Nature’s most violent and destructive forces. Most chasers say they’re in it for the science, but some are just there to be cool and have a little adventure.
A typical chaser will have a laptop with a weather software program open, and may also have an Internet connection to get the latest updates on storms from the National Weather Service (NWS). Chasers often drive around with GPS systems or cellular data connections in their cars, which they use to monitor storm locations. They’re also likely to have radar scanners and ham radios for car-to-car communication.
Whether it’s a video of a tornado or a video of their own car getting overtaken by a wind-swept sandstorm, storm chasers love to share their videos online. Most of them are amateurs who enjoy the challenge of capturing spectacular images, but some professional photographers and videographers are also in it for the money.
Homeowners are sometimes tempted to hire storm chasers for their quick home repair services after a severe weather event, but these transient contractors often lack the necessary experience to offer a reliable and long-lasting solution. In addition, they usually move on to another job after finishing the repairs at your property, leaving you with no warranty or support for any issues that might arise.
General Contractors
Generally speaking, general contractors (or GCs) are licensed professionals who oversee construction or renovation projects. Depending on the scope of your project, they may be responsible for everything from securing materials to obtaining necessary permits. Additionally, GCs typically employ specialty subcontractors to manage the specialized aspects of your project, like roofing, plumbing, or electrical work.
When hiring a GC, it’s important to make sure they are licensed and have a solid track record of successful projects. You should also ask for a list of references and check them thoroughly. You’ll be working closely with your contractor for several months, so you want to ensure that you can get along and trust each other.
A reputable GC will be able to provide you with detailed estimates of your project costs and timeline. In addition, they will be able to guide you through the entire renovation process. They will handle all the details of your project, including scheduling, coordinating with other tradesmen, and cleaning up the construction site.
Many GCs have strong connections in the industry and can negotiate with vendors to secure high-quality products and experienced subcontractors for your project. This helps them to complete your renovation on time and within budget.
Additionally, GCs can protect your products’ warranties or guarantees by properly installing and caring for them during the construction process. This will ensure that your home’s renovations are done correctly and will last for a long time.
Another benefit of using a GC is that they can help streamline your renovations by handling all the payment processing. Rather than dealing with multiple contractors and suppliers, your GC can pay all the different specialty workers, allowing you to keep your focus on your home renovation project.
Lastly, a GC can also help you to avoid construction delays by providing lien waivers and other documents that are required for the construction industry. Lien waivers are crucial in ensuring that you are paid for your completed work, especially during complex construction projects.
Service Roofers
Roofers who offer full service can inspect, repair and replace a roof. They can also help homeowners with their insurance claims and work on new construction projects as well as renovations to older homes. They can install and repair a variety of roofing systems, including asphalt shingles, tile, metal and other types. They are skilled in identifying and repairing problems with shingle seams, flashing, insulation and ventilation. They can also handle leaks and other issues with gutters, downspouts and chimneys.
Residential roofers typically work on single- and multi-family housing units. They navigate through residential neighborhoods to access rooftops using ladders and scaffolding. They work quickly to install or repair roofs, ensuring the integrity of the structure and avoiding damage to other parts of the home. They may interact with homeowners and provide a written estimate before beginning the project.
These professionals can also install and repair windows. They have experience with diverse window types, such as sliding, casement, double-hung, bay and bow windows. They can install and replace a wide range of siding as well, improving curb appeal and energy efficiency.
Commercial roofers specialize in larger-scale roofing projects, such as office buildings and retail centers. They often have to deal with complex roofing systems and larger crews. They must be familiar with regulations and standards specific to these environments.
Storm chasers typically target areas that have been heavily affected by severe weather and high winds. They usually work on a contract basis, charging a fee for inspections and estimates and then collecting payment once the job is completed. They can be helpful for people who have been through a bad hailstorm, but they should not be considered as a long-term roofing solution.
Some roofers focus solely on repairs and maintenance. They can address small leaks and other issues, as well as clean and condition the surface of a roof. They can also identify outlying areas of a roof and seal them to prevent water infiltration and other issues. These services are important for homeowners who want to preserve their property value and avoid costly replacements in the future.
Should You Repair Or Replace Your Roof?
When determining whether to repair or replace your roof, start with a visual examination of the entire structure. Check gutters and roof edges, as well as flashing around chimneys and dormers.

Look for damage from fallen limbs, hail, and water leaks that can cause mold and mildew in your home. Also look for standing water that suggests you may need better drainage.
Shingles are your roof’s first line of defense against weather, sun and other forces that can damage the underlying structures of your home. They’re also a critical part of the structural integrity of your roof, which means that a single damaged shingle can lead to leaks and other problems. A professional roof repair contractor will check shingles to make sure that they are securely fastened and free from any signs of wear or damage, such as cracking, which could allow moisture to penetrate your home’s interior.
Replacing a damaged shingle is not difficult for homeowners who have the right tools and a little patience. Start by determining how many shingles need to be replaced so that you can purchase the correct number at a home improvement store. Ensure that you have the proper safety gear to work on your roof, including a ladder, safety harness and hard hat. It’s important to remember that working on a roof can be dangerous, especially if your home has a steep pitch or is two stories or more above ground.
Before starting, remove any shingles that are overlapping the damaged one to prevent damaging them when you pry up the surrounding ones. Use a flat pry bar to break the glue seal and loosen the nails on the shingle you wish to replace. Carefully lift the shingle to expose the nail and carefully remove it. Continue this process for all of the shingles above the row that contains the damaged shingle to expose and remove the nails.
When the repaired shingle is in place, apply a dab of roof cement to secure it to the roof surface. You can find roof cement at most hardware stores and it comes in a variety of colors to match your existing shingles. The sealant can help prevent water from getting into your home through any cracks in the shingle or other areas of your roof structure.
Leaks are a clear sign that your shingles need to be replaced, but it’s important to understand the reason for the leak before you decide whether a replacement is the best option. In some cases, leaking shingles can be the result of deliberate damage inflicted by an unscrupulous insurance adjuster or homeowner. Depending on the location of the shingle damage, other factors may be at play, such as improper ventilation or excessive heat, issues with your roofing materials or moisture-related problems.
Missing Shingles
Shingles are the primary weather shield for a roof and, when they go missing, it opens up your home to severe damage. Even just one missing shingle means that the rainwater will have an easy path into your attic or upper floor of the house. This will soak the drywall, insulation, paint, plywood, and other areas. Over time, the moisture will rot and weaken these important supports, leading to further problems including foundation cracking and roof caving.
Missing shingles are often caused by wind. If you live in a particularly windy area, your shingles are at high risk of losing their place on your roof. However, this is not the only cause of shingle loss. Age and workmanship are also factors that can lead to shingle loss. Overtime, shingles will lose their oils and become more brittle, which can make them more likely to dislodge in a strong storm.
If you have a shingle that goes missing, the first thing to do is to inspect it for damage. If there is no visible damage, the next step is to check the attic or upper floor for water leaks. If there is no immediate evidence of a leak, you will want to get a professional roofing contractor to do a thorough inspection to see if the missing shingle is a sign of a larger problem.
A missing shingle is a signal that your roof needs attention. This is especially true if the shingle was covering a seam, as the design of your roof is built so that the shingles above cover the seams of the ones below. This minimizes the chance of leaks in the future. Missing shingle tabs and exposed nails are also signs that you need to repair your roof.
It’s best to hire a roofing company for your inspection and repair, as the process can be complex and difficult for an amateur. The professional roofing crew will be able to spot all the problems, replace the damaged shingles, and ensure that your roof is in good working order. A roofing expert can also determine if you need to file a homeowner’s insurance claim if your shingles are lost due to storm damage.
Cracked or Missing Supporting Structure
If you notice any cracking within a structural element of your home or building, it’s vital to seek advice from an experienced Structural Engineer. This is to ensure that you can be confident in the ideal structural repair strategy to be undertaken.
Whether it’s a wall, floor, or ceiling, structural cracking can be incredibly worrying. It may not only indicate structural damage but also the potential for a more serious issue, such as water ingress, pest infestations or even a collapse of the structure.
It’s important to determine whether the crack in question is active or dormant before deciding on your next move. Active cracks are at risk of growing or spreading, so should be attended to immediately. However, dormant cracks are less of a concern but are still worth investigating to prevent them from getting worse over time.
The most common type of structural cracking is vertical cracks within walls. These could be a result of a movement in the ground supporting the wall or a shift in the load-bearing materials. This can be caused by heave, up-lift, soil erosion, tree root growth, salt attack, poor workmanship, and ageing of the material.
Horizontal cracking, which is commonly seen in brick and concrete buildings, can also be indicative of a structural problem. This can be due to the shrinkage and expansion of the brickwork, but it’s equally as likely that this cracking is a result of a deterioration in the steel reinforcement or concrete.
For more serious issues, the underlying material may be failing due to corrosion or damage. In this case, the best course of action is to carry out a structural repair by replacing the damaged or corroded elements with new materials that can withstand the stresses and strains of the building.
In some cases, the structural repairs required can involve upgrading existing building components to meet higher standards of fire safety, energy efficiency and accessibility. These are often complex projects that require specialist knowledge of the relevant building regulations and codes. At Perfect Remediation, our team of experienced engineers, estimators and contractors work together to deliver these large-scale structural repairs flawlessly.
Water Leaks
A roof leak is not only unpleasant, it can cause mold and mildew to grow and rot your home’s wood framing and sheathing. Detecting and repairing leaks quickly is essential to prevent further damage. Leaks occur when sealed joints, such as seams and flashing, shift, creating open gaps for water intrusion. Look for areas of discoloration on ceilings and walls, sagging or buckling areas, peeling paint, moisture stains or drips from ceilings that align with the flashing seams.
Identifying the source of a leak can take some sleuthing. It may help to shut off the water and use a damp sponge to check for moisture in the attic or walls. If you spot signs of mold, mildew or water stains, it’s important to have a professional inspect and evaluate the severity of the problem.
If your roof is over 20 years old, it’s a good idea to get an inspection and a quote for repair work. Even small leaks that go undetected for a while can lead to rotted framing and sheathing, destroyed insulation and sagging or damaged ceilings.
Leaks are common, but it’s easy to stop them from damaging your home with simple repairs. Check your gutter systems to ensure they are free of clogs and directing water away from your home, then check the flashing around chimneys, skylights, roof vents and other entry points on your roof. If you’re comfortable on the roof, you can also walk around and visually inspect shingles and the decking.
If you find a crack or a gap, fill it with caulking suitable for exterior projects. Scrape out the old caulking, cut a tube of new caulking and apply a thick bead to the surface. It helps to have an assistant, especially if you’re working on a steeply pitched or tall roof. Be sure to use a caulking that’s made for outdoor use, such as butyl rubber. Be careful when climbing on your roof to avoid falling debris and make sure it’s safe to work there before you start a project. For a more extensive repair, hire a qualified roofer.
Stucco Removal – What You Need to Know
There comes a point in most homeowners’ lives when they will have to consider stucco removal. This may be due to an underlying issue such as moisture intrusion or shoddy initial installation that has led to extensive damage over time.

Begin by scoring the stucco in a hidden area. Draw guidelines using chalk to determine how large of a chunk you are comfortable removing at a time. Contact Stucco Removal now!
Stucco is a common exterior wall covering that has been around for thousands of years. It is a variety of plaster that consists of sand, cement and water, and it can be applied in many different ways to create a unique look. It can be textured, colored and tinted to suit your home, and it will last for many years without needing extensive maintenance.
It is also fire-resistant, which makes it a great choice for homes in hotter climates. If you’re thinking about adding stucco to your home, it’s important to know the benefits and downsides of this type of siding.
The first step in removing stucco is to prepare the worksite. This usually involves laying tarps to contain any debris and assembling scaffolding, if necessary. The workers will then use a circular saw to cut through the top layer of stucco. The next step is to use a hammer or crowbar to remove any loosened pieces. The workers will continue this process until all of the stucco has been removed.
Once the workers have finished removing the stucco, they will clean the wall surface. This is important because stucco can be ruined by high accumulations of moisture. Moisture can cause mold, which can then wreak havoc on the structure of your home. This is especially true if you live in an area with a high humidity level.
You should also clear the area that you plan to stucco. It’s best to remove all paintings and rugs from the area, as well as cover any furniture that isn’t too heavy to move. This will help the adhesive cement to stick better to the wall surface and prevent it from leaking or staining anything underneath it.
Once you have the wall clean, you can begin applying the first base coat. This coat is known as the scratch coat, and it’s typically made from a mix that’s slightly different from the finish coat.
Apply this coat until it’s about a quarter inch thick. If you’re working outdoors, you should spray it with a light mist of water to keep the mixture workable. Then, allow the brown coat to dry for about 10 days.
Reputable Businesses
Stucco is a popular building material that’s used on a variety of structures including single-family homes. It’s an attractive option that provides a wide range of benefits, such as energy efficiency and moisture control. It also adds a distinctive look to your home, but like any product it needs proper care to maintain its condition and function.
When your stucco becomes damaged, it’s essential to call a professional immediately to prevent further damage and protect the value of your investment. If moisture seeps through the stucco, it can destroy the walls and even threaten the structural integrity of your home. It’s a good idea to keep an eye out for warning signs that you should get your stucco repaired, such as exterior cracks, damage, and stains.
A reputable stucco remediation company will conduct a thorough inspection of your siding to determine if there are any underlying issues that need to be addressed. They’ll take into account things such as sagging sheathing, exposed framing members, and the presence of mold or water damage. They’ll then recommend the best course of action to correct the problems.
Once the problem is identified, they’ll remove any existing stucco and install a new layer. They’ll also reinstall sheathing and re-attach the metal lath that supports the stucco. In addition, they’ll inspect your landscaping and interior openings such as windows to ensure that they are protected from harm during the process.
Depending on the extent of the damage, your remediation may include removing and replacing drywall as well. They’ll then clean and prime the walls before they apply the new stucco coat. During this process, they’ll ensure that the new coating adheres properly to the wall and that no gaps are left between it and the sheathing.
It can be difficult to determine whether your stucco requires repair or remediation, especially if you’re not familiar with the difference between the two services. Remediation is a more comprehensive service than simple repair, so it’s important to find a business that can provide both services when necessary.
Safety
As a homeowner, it’s important to consider safety measures when undertaking a stucco removal project. This is because sand and concrete are incredibly hard and dense, which can lead to injuries and property damage if not handled properly. For this reason, it is recommended that you have a friend assist you with the job or hire a professional to handle the work for you. It is also advisable to wear protective clothing such as gloves and goggles during the process.
A few decades ago, stucco enjoyed a period of popularity as an exterior aesthetic choice, and many people opted to cover their brick and mortar walls with this material. However, the truth is that stucco is a poor insulator and can cause moisture problems in homes and buildings. This is because it has a high water absorption rate, which can lead to rot, mold and other structural damage.
This moisture can be caused by a number of different things, including heavy rains and high humidity levels. It can also occur as a result of insufficient ventilation, which leads to the buildup of condensation. This, in turn, can cause a white, powdery substance known as efflorescence or, more severely, a crumbling surface that’s called cryptoflorescence.
To avoid this, it is essential to have your stucco repainted and resealed every few years. These coatings act as a barrier, stopping some of the moisture from penetrating the surface of the wall. However, they can also degrade over time. This leaves your walls vulnerable to moisture damage, which can worsen over time and result in costly repairs.
It’s also a good idea to regularly inspect your stucco for signs of damage. Doing so can help you identify problems early on, and you can take steps to correct the problem before it gets worse. This is especially important if you live in an area with a lot of rain or other weather conditions that can cause water damage to stucco.
Taking the time to inspect your stucco can save you a lot of money and prevent expensive repairs in the future. If you are unsure about how to properly care for your stucco or don’t have the necessary endurance and strength to do it yourself, contact a reputable stucco company like Patch Dudes for assistance. They’ll be able to provide you with a free quote and can handle the entire job for you.
Time
As with any project, there are factors beyond the control of both you and your contractor that can affect how long it takes to complete stucco removal. These may include weather conditions, material shortages and labor availability. These issues should be discussed with your contractor prior to starting the project and will help to determine how much time you should budget for the job.
Depending on the type of home you have, the type of foundation and the amount of stucco to be removed, it can take anywhere from a day to several weeks for the crew to finish their work. In addition, there is often a significant amount of debris left behind that will need to be cleaned up and hauled away. This can add to the overall cost of your project.
Stucco is an insulating siding that adds value to your home, but it can also be prone to damage. These problems can range from hairline cracks to severe structural damage that requires a costly repair. Regardless of the cause, it is important to address these issues as quickly as possible to avoid allowing them to worsen and possibly compromise the integrity of your house.
Cracks in stucco are common due to a number of factors including poor installation, changes in temperature and even the settling of your house. Cracks that are not addressed quickly can result in a loss of energy efficiency and moisture penetration that will lead to mold and mildew.
Inspecting your stucco on a regular basis can help you to catch small or larger damage before it becomes a major problem. A good rule of thumb is to walk the perimeter of your home on a regular basis, usually monthly, and assess any areas where there are signs of damage such as chips, cracks or other discoloration.
Keeping your stucco clean can be done on a regular basis by spraying it with water using a hose or pressure washer. This will remove dirt and biological growth that can make your home look unsightly and it can also help prevent surface damage. To get rid of green algae that is growing in the pores of your stucco, you can use a solution made from non-chlorine bleach and white vinegar. This mixture will draw the fungus to the surface, where it can be scrubbed with a brush and then rinsed with water.
The Benefits of a Restroom Trailer
Unlike a standard port-a-potty which is a single portable toilet, restroom trailers offer comfort for your guests and employees. These luxury units have flushable toilets, running water hand washing sinks, air conditioning and heating.

To operate a restroom trailer you will need a flat surface to park it on like a driveway or the event venue parking lot. It also requires electricity to operate the pump, air conditioning and electrical lights. Click https://nextdaypotty.com/ to know more.
A restroom trailer provides an experience that is far more comfortable for your guests than a standard portable toilet. It can help you ensure that all your guests have access to clean restroom facilities during an event, regardless of where the venue is located. It’s also an ideal option if you have a lot of people at your job site, and you want to ensure they can use the bathroom comfortably without having to travel long distances.
Unlike traditional port potties, restroom trailers are designed to be more spacious and feature running water sinks for handwashing. They also provide high-quality hand sanitizer stations that help prevent the spread of germs and bacteria. They are a great choice for events or job sites where hygiene is of the utmost importance, as they can help reduce illness and absenteeism.
The interior of a restroom trailer is designed with luxury in mind, and it can be decorated to suit your needs. You can choose from a variety of styles, including ADA-compliant options that meet the needs of disabled guests. This ensures that every guest has the same level of comfort and accessibility, which is an important part of a positive customer experience.
You can also add an extra level of comfort to your restroom trailer by adding air conditioning and heating systems. This will keep you and your guests cool on hot days, and warm during the colder months. You can even add a stereo system to your restroom trailer, which will make it even more enjoyable for your guests.
Another way that a restroom trailer can improve the comfort of your guests is by providing more privacy. Unlike standard portable toilets, which are open-air cabins that expose waste, restroom trailers have closed doors to provide privacy and safety. They also have urinals that are flushable, which eliminates the need for deodorizers and chemical solutions.
Another advantage of restroom trailers is that they are easy to move and set up. They are also easy to maintain and can be rented or purchased for a low price, making them an affordable option for your business or event.
Easy to Move
A restroom trailer provides a portable bathroom solution for people that is not only easy to move around, but also more spacious and comfortable than the standard porta potties. In addition, it is much easier to clean and maintain than a portable toilet.
For example, the women’s side of a restroom trailer can feature four spacious stalls with floor to ceiling doors and climate control. It can also include overhead music, frosted accent lighting and twin stainless steel sink basins with vanity mirrors to provide an experience that is both comfortable and luxurious.
These features help to create a more private environment, which is important for women and men alike. The trailers can also be adapted to accommodate different stall sizes. If you need a more deluxe unit, you can opt for a 6- or 8-stall model that has single doors for each gender.
In addition, these trailers are easy to set up and can be transported between events or work sites with ease. This can be a huge benefit for event organizers who are looking to accommodate guests or workers. They are also a great option for construction sites, where it can be difficult to build permanent restroom facilities. Lastly, these units can also be used for movie and TV productions to provide convenient bathrooms for cast and crew members.
If you’re interested in purchasing a restroom trailer, be sure to look into the tax advantages. If you use the restroom trailer for business purposes half of the time or more, it can qualify for a Section 179 tax advantage. This can save you a significant amount of money on the purchase of the trailer.
When you’re renting or buying a restroom trailer, it’s important to make sure that the area where it will be placed is flat and level. This will allow the trailer to function properly and prevent any damage or wear from being caused by uneven terrain. In addition, it’s important to place wheel chocks in front and behind the trailer when setting it up to keep it from rolling away while you are hooking or unhooking it from your vehicle.
ADA Compliant
Unlike single porta-potties, restroom trailers have flushable toilets and are ADA compliant. This is important because ADA regulations require accommodations for people with disabilities and requires that public spaces provide accessible facilities. Restroom trailers have accessible stalls, exterior ramps, and spacious interior layouts. They also have grab bars and sinks that are at an appropriate height. This ensures that guests and employees with mobility issues can use the restroom comfortably.
Whether you need restrooms for a small event or a large construction site, a restroom trailer is a great option. These portable bathrooms have the space to accommodate many people at once, which can reduce waiting times and improve traffic flow. They are also easy to set up and have the amenities that guests expect, like air conditioning and heat.
When renting a restroom trailer, make sure that you have enough power to operate it. Most problems with restroom trailers are related to insufficient electricity, so it’s important to get the right type and size of power cord. You should also consider how long you’ll be using the restroom trailer, as a shorter rental period will require less electricity than a longer one.
Most restroom trailers have a city water connection provided below the mechanical room. This is where the toilets and sinks draw their water from. The ADA toilets also have a large waste tank that is built into the frame structure. The waste from the toilets and sinks drains directly into this tank. Satellite Suites ADA trailers come standard with a time-tested waste vacuum system that evacuates, grinds and pumps the waste into an interior or exterior tank, another trailer tank or directly into the sewer line up to 300 feet away.
When setting up the restroom, choose a position on your site that is level and dry. It should also be within easy reach of a truck that will be coming to pump out the waste tank each day. A 3″ dump valve comes installed on the towing end of the trailer, which a truck can connect to and empty the waste from the restroom. This can be done each morning before the crowds arrive to minimize odor and sanitation issues.
Easy to Clean
A restroom trailer is designed with hygiene and sanitation in mind. The interior surfaces are crafted using materials that easily wipe clean with standard household cleaners. Keeping the interior clean between rentals is the best way to ensure your event is a success and that no unwanted bacteria or odors are introduced.
Depending on the trailer you choose, it may have an on-board water holding tank or city water connection to supply the toilets, sinks and urinals. In either case, it is important to drain and remove all of the water prior to transporting your restroom trailer for storage or preparation for its next use. This includes removing any water in the waste tanks as well as ensuring all faucets are turned off and that all vents are closed.
It is also recommended to do a full inspection of the restroom trailer before it’s used again. This includes checking in on toilet paper, paper towels, hand soap and other supplies and refilling them as needed. In addition, it’s a good idea to check for any visible signs of damage or wear and tear that should be addressed and make sure ramps are stable and grab bars are secure.
Finally, it is recommended to add anti-freeze to the restroom trailers plumbing system to protect the pipes from freezing and potentially damaging the system. This is particularly important for ADA-compliant restroom trailers where the water lines connect to the fixtures including toilets, sinks and urinals.
Typically, this involves opening the fresh water fill valve and flushing each toilet, sink and urinal several times until only air is coming out of them. After doing this, the water can be drained from each fixture and the toilet, sink and urinals can be opened up to let air in and allow them to dry completely.
With four decades of experience, extreme dedication to service and groundbreaking innovations for the portable sanitation industry, CALLAHEAD is the clear choice for all of your site restroom needs. Providing one-of-a-kind restroom trailers that are hospital grade clean with professional uniformed service, our team delivers peace of mind and an exceptional customer experience.
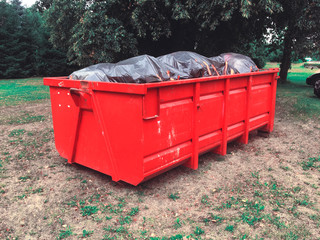
Dumpster Rental Tips
Dumpster Rental Baltimore provides a quick and easy way to dispose of waste. It is especially useful if you are doing a large home renovation or cleanup project.
You can put most types of trash into a dumpster, but there are some restrictions. For instance, you cannot throw hazardous materials in a dumpster.
Finding the right dumpster size is one of the most important steps in the dumpster rental process. You want to choose a container that is large enough to accommodate all of your waste, but you also don’t want to go overboard and pay for more space than you need. Fortunately, there are some tips you can use to help you select the perfect dumpster for your project.
A common guideline to follow is the rule of thumb that a dumpster should be the size of a full-size pickup truck. However, comparing dumpster sizes based on their volume capacity is not always accurate. You need to consider the weight of the trash, as well as its density. For example, a standard washing machine or a king-size mattress each takes up about 1 cubic yard of space.
An ideal choice for small renovations, garage cleanouts, and do-it-yourself home projects is a 10-yard dumpster. These containers typically measure 12 feet long, 8 feet wide and 4 feet tall — about the size of a small car. They have a volume capacity of about 50 to 70 trash bags and can hold up to three pickup truck loads.
If you’re looking for a little more space, then a 15-yard dumpster may be the right choice for you. These containers are similar to the 10-yard dumpsters, but they have a slightly larger volume capacity of about 65 to 80 trash bags. They can also hold up to six pickup truck loads of debris.
A 30-yard dumpster is perfect for medium-scale remodeling and demolition projects, including whole house cleanouts and new construction. This size dumpster can also be used for commercial and industrial cleanup projects.
Once you’ve decided on a dumpster size, the next step is determining where to place it during the rental period. The location of your dumpster is essential, as it determines how much access you will have to the bin and can affect its overall safety and convenience. For example, if you’re planning to place the dumpster in a location that receives a lot of foot or vehicular traffic, make sure the bin doesn’t obstruct pathways, driveways or roads.
The Weight of the Waste
Home improvement projects, demolition, and construction can generate tons of trash. While some of this waste can be placed with residential trash collections, most of it will need to go to a landfill or recycling facility. That’s where dumpster rentals come in. These trash containers offer a temporary waste management solution for large amounts of bulky and heavy waste.
When choosing a dumpster size for your project, remember that it’s not only about the volume of waste but also about its weight. To avoid overage charges, you should have an accurate estimate of the weight of the materials that will be disposed of. Tools like online calculators, volume-to-weight conversion charts, and scales can help you with this estimation.
Aside from the weight of the waste, you should also consider how much space the materials will take up in the dumpster. For example, if you’re planning on throwing away a lot of concrete, it will take up a lot more space than wood or drywall. That means that you’ll need a larger dumpster or even multiple dumpsters to stay within your rental weight limit.
If you’re planning on renting a roll off container to dispose of heavy waste, you may need a permit. Check with your local city’s building or public works department to find out if you need one. Also, if the dumpster will be placed on a public street or sidewalk, you’ll need a street right-of-way permit. If you’re renting a dumpster for a driveway or private property, there’s no need for a permit.
Another thing to keep in mind is that dumpsters are weighed upon delivery and pickup. This helps the company ensure that the load is not over its weight limit before bringing it to the landfill or recycling facility. If it is, the additional weight will be charged over and above the flat rate for the dumpster.
Some common household items that can be thrown in the dumpster include boxes of junk, rugs, furniture, toys, kitchen and bathroom appliances, and scrap metal. You can also dispose of general construction and remodeling debris, including brick, concrete, asphalt, and shingles. However, certain materials such as Freon-containing appliances will need to be taken to a professional disposal company for proper handling and disposal.
The Place to Place the Dumpster
If you’re doing a major renovation project, you’ll have a lot of waste to get rid of. A dumpster rental can help you take care of all that trash. But it’s important to know where to place the dumpster so that it can be accessed easily and without any obstructions. In addition, the location should be safe for trucks that will pick up the dumpster and dispose of its contents.
Ideally, the dumpster should be placed on a hard, flat surface that can handle the weight of the container. This could be your driveway or a parking lot. A dumpster should also be kept a reasonable distance from buildings and structures so that debris that’s thrown away doesn’t damage the property. If you’re placing the dumpster on a road, be sure to check with your local municipality to see whether it’s necessary to obtain a permit.
Another important factor to consider is how close the dumpster can be positioned to a house or other structure. Ideally, you want to keep it a little bit farther back than that, so that the debris doesn’t blow into the home or other structures. Keeping it closer will increase the likelihood of damage from the truck’s tires.
In addition, if you’re going to put the dumpster on your neighbors’ property, be sure to ask them first. If you don’t, you may aggravate them and run the risk of them calling the authorities or damaging their property.
Once you’ve found a good dumpster rental company, make sure that you’re aware of the rules regarding what types of waste they can accept and what kinds of materials aren’t allowed. Some materials aren’t suitable for recycling and can cause harm to the environment, such as wet paint or asbestos. You should also avoid putting any hazardous materials in the dumpster. Instead, you can donate them to a charity or second-hand store. This will ensure that they’re disposed of properly and won’t be damaging to the environment. It’s a much better option than simply throwing them away with the rest of your trash.
The Type of Waste You Can Put in the Dumpster
Many different kinds of waste are collected by dumpster rental companies for recycling. These include glass, aluminum, plastic, and paper. The waste is then sorted and sent to recycling plants for processing. This reduces the amount of trash that goes into landfills, which can cause problems for the environment. In addition, the recycling process saves raw materials that could be used by other businesses.
When you are looking for a dumpster rental company, it is important to choose one that offers the services you need. For example, if you are doing a home remodel, you will need to dispose of construction debris. Some items cannot be placed in a dumpster, such as stumps and mattresses. It is also a good idea to check the city’s rules about what can and cannot be put in a dumpster.
A dumpster is a large container used for disposal of bulky or heavy materials. Most dumpsters have a weight limit included in the quoted price, so be sure not to exceed it. Overloading the dumpster can damage the truck that picks it up, so you should be careful about what you put in it.
Some materials that can’t be put in a dumpster include wet paint, asbestos, oil or any other type of liquid, and tires. Some types of electronics are also not allowed, such as televisions and chargers. These should be recycled instead of thrown away, as they contain dangerous chemicals that can contaminate the environment.
If you want to start a business that deals with dumpster rentals, you will need to make sure you have enough capital for startup costs and ongoing expenses. A dumpster rental company requires a lot of money to buy and maintain its inventory, trucks, and employees. Therefore, it’s important to find a lender who can provide the financing you need.
In order to succeed in the dumpster rental business, it is crucial to have a well-planned marketing strategy. This will help you reach your target audience and build a brand for your company. You can use different marketing channels, such as social media, to promote your company.
Essential Tips for Heating Repair
Some simple maintenance tasks, like replacing air filters or clearing debris from around the unit, can be handled on your own.

In an ideal world, homeowners would not have to worry about their heating systems making any strange sounds. However, this is not always the case and it is important to know what types of sounds are normal versus those that should be a call for service. Whether you are a new or experienced homeowner, knowing what your system is supposed to sound like can help you determine when it is time to seek professional assistance with your heater.
Loud banging noises are usually the biggest indicators that something is not right with your system. This sound often occurs when the ignition system or pilot light experiences a hiccup when starting up. The system is supposed to spark the gas immediately when it gets the green light from the thermostat, but this doesn’t always happen and the gas hangs out in the combustion chamber until it is ignited again. This can result in a loud banging sound that is heard throughout the home.
Other common sounds that may be heard from your furnace include humming and clicking. A soft hum is a normal sound that can be heard from most heating systems when they are running and this should not be cause for alarm. However, if the sound becomes louder during operation or it appears to be occurring at times when it is not normally present then this could be an indication of a motor issue and should be looked at by a technician.
Rattling sounds may also be a sign that the system is in need of repair. This can be caused by loose screws and panels that have begun to rattle as the system runs. This is typically a minor problem that can be resolved with a quick heater repair visit and the replacement of some small parts.
Screeching sounds can also occur from the heater and this is usually a sign of a problem with the motor bearings. This is a common symptom of wear and tear on the components within a forced air system and should be looked at by a qualified technician as soon as possible to avoid the need for more costly repairs later.
Yellow Flames
If your furnace’s flames are yellow or orange, that’s a clear sign you need to schedule immediate heater repair services. These flames indicate incomplete combustion that can leak carbon monoxide into your home. The presence of carbon monoxide poses serious health risks, especially to children and seniors.
The most common reason for a yellow burner flame is dirty burners that need to be cleaned. Over time, dust and other contaminants can build up on the burners, interfering with the proper balance of fuel and oxygen necessary for a blue flame. A professional technician can clean the burners to remove these contaminants and restore the blue flames.
Another potential cause of a yellow burner flame is a malfunctioning gas valve. This part of the heating system controls the flow of gas to the burner assembly, and it’s essential for ensuring the correct mixture of fuel and air for proper combustion. A technician can assess the gas valve for problems and repair or replace it as needed.
A yellow or orange flame can also be a sign that the heating system isn’t supplying enough oxygen to the combustion process. This condition may require the installation of a new air filter to ensure proper airflow.
Finally, a yellow flame can be caused by an electrical problem with the heating system’s ignition switch or thermostat. These parts of the system are responsible for turning on and off the burners, so if they’re malfunctioning, it can cause an improper mixture of fuel and air and produce yellow or orange flames.
A steady, blue flame is the hallmark of a healthy furnace. A professional inspection and maintenance can keep your system running as intended, reducing energy bills, lowering your risk of a fire, and minimizing carbon monoxide leaks in your home.
Unusual Temperatures
If your heater starts heating up erratically, it could indicate problems with the system’s thermostat or even a problem with the system itself. A thermostat that malfunctions can lead to inconsistent heat distribution in your home, and a damaged heater might also prevent the ductwork from properly distributing air.
When temperatures plunge to extremely low levels, your heater may have to work overtime to maintain a comfortable indoor temperature. This extra strain can place unnecessary wear and tear on the various components in your unit. Over time, this can cause them to fail, which is why it’s so important to take notice of any unusual heating issues as soon as they crop up.
A well-functioning heater should operate quietly, producing only a soft hum or the sound of blowing air. Unusual noises like rattling, banging and creaking are sure signs that something is amiss with your heater. These sounds are often caused by loose or damaged parts inside the unit, and ignoring them can exacerbate the issue and lead to more costly repairs.
Uneven heat distribution in your home is another indication that you need a heater repair expert to visit your house. This could be caused by a variety of things, from faulty thermostats to blocked or dirty ductwork. It’s essential to get this issue addressed as quickly as possible to avoid a cold and uncomfortable winter.
Your heating system is supposed to provide warm air throughout your entire home. If you notice that some areas feel warmer than others, it’s a sign that the system is not working as it should be. Uneven heat distribution can occur for a number of reasons, including insufficient heating at the thermostat level, poor airflow through the ductwork, or dirt and debris accumulation in the ducts and air filters.
When a heater isn’t working, it can create dangerous fumes that might leak into your living space. These fumes can make you sick and lead to a range of health complications. It’s important to have any leaking gases, such as carbon monoxide, checked and repaired right away. In most cases, these gases can be detected with a simple carbon monoxide detector, which you should have in your home. If the detector detects high levels of carbon monoxide, you should immediately leave the building and call 911.
Low Fuel Levels
If your heater turns off, it is always a good idea to check to make sure that the problem isn’t related to a low fuel oil level. Most tanks have a gauge that lets you know how much oil is left, and if it’s below half a tank, it’s a good idea to call for a home heating oil delivery service.
If the tank is full, and your heater just seems to be acting up, try opening the panel on the front of the burner and pressing the reset button (if there is one). It may dump a little extra oil into the system, and get it working again. Just be careful not to push the reset button more than once, as it can cause your system to flood, which will require a costly repair.
Ceiling Repair – Why You Should Hire a Professional
Ceilings are often overlooked, but repairing them can make the difference between a room that looks old and unfinished and a room that feels bright and modern. While some minor ceiling problems can be handled by savvy homeowners, serious issues like water damage or structural problems require professional repair.
For example, replacing damaged drop tiles costs a fraction of what it does to replace an entire main house support beam. Contact Ceiling Repairs Perth now!
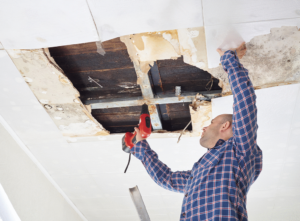
Water damage to your ceiling isn’t just unsightly, it can also be dangerous. It can lead to mold, mildew and structural problems that threaten the safety of those living in your home. Water staining on the ceiling can be an indicator of plumbing issues, so if you notice it, check to see if there are any leaky pipes in the area. It can also indicate a roof problem or flooding from a storm.
A professional will be able to identify and repair the source of the problem, as well as dry out the affected area. This will involve opening up the ceiling panels, using fans and dehumidifiers, and cleaning with a mold cleaner to prevent mold growth. It may take a few days to a week for the ceiling to dry completely and be ready for repainting.
In some cases, a full replacement of the damaged part of the ceiling may be necessary. This will be the case if the material has become weakened by repeated exposure to water and if it can no longer be reliably repaired. In these circumstances, a new ceiling might be the best option to ensure that the integrity of your house is maintained.
If you’re looking to replace a section of your ceiling, start by removing the water-damaged drywall and putting down drop cloths or tarps to catch the drywall dust. It’s a good idea to use a utility knife to make a shallow cut around the damaged area, rather than cutting straight across, to avoid inadvertently stripping the paper face of undamaged drywall.
Once the damaged drywall has been removed, it’s a good idea to put down some oil or shellac-based primer. This will prevent the stains from coming back, and will protect the ceiling surface as it dries. Once the primer has dried, re-paint the entire ceiling in its original color to create a seamless look.
If you have water stains on your ceiling, it’s important to act quickly. This will help to prevent the development of mold and mildew, which can cause respiratory problems for those living in your home. It can also lead to rot, which can compromise the structure of your home and leave you with expensive repair bills.
Cracks
Most cracks in ceilings aren’t as serious as they might seem. If the crack is small and it doesn’t extend to other walls, it might be a result of some slight movement of the house or it could even be due to a paint or plaster build up that needs to be addressed. However, if the crack extends to other walls or is accompanied by other signs of structural damage, it’s best to get in touch with a professional and have them assess the situation.
If your cracks are discolored, it is most likely because of water damage. The good news is that this type of crack can usually be repaired fairly easily by a skilled DIYer who knows how to patch drywall. However, you might need to hire a plumber to fix the cause of the problem first.
In some cases, cracks appear in the ceiling after a storm or even as a result of high winds. In this case, the cracks might not be serious and can be spackled with putty to repair them. However, if they are very wide or extend to other parts of the house it’s probably best to have a professional assess them before you attempt to repair them.
Another common reason for ceiling cracks is the natural settling of a house. This can occur for a variety of reasons, such as if the joists weren’t properly spaced during construction, a heavy object was placed on the floor above or if the foundation settles unevenly into the ground. If this happens, it’s vital that you consult with a professional and have them check that the house is still safe for living before moving in.
It’s also worth getting a property survey done when you notice cracks in the walls or ceiling as it may be a sign that there are serious problems with the structure of the building and that a major renovation project is required. This will give you the opportunity to pull out of a sale if necessary or negotiate the price with the seller.
Sagging
If a section of your ceiling is beginning to sag it’s a sign that it needs repair. While a sagging ceiling might seem like a minor cosmetic issue, it can be dangerous if not addressed quickly. Sagging ceilings are often caused by water damage and are also a sign of structural problems in the home.
One of the most common causes of sagging in a ceiling is because of the weight of heavy items being stored there or from an improperly designed HVAC system. It is also possible for a ceiling to sag due to house settling, which is a normal part of the building process. Changing weather conditions can also cause movement in the foundation and frame of your home, which can affect materials that are attached to or held up by it, including your plasterboard and ceilings.
The first step in repairing a sagging ceiling is to determine what is causing it. You may find that the sagging is only in the sheet rock and can be repaired by fixing some nails that have pulled out, or it could be that the trusses or framing of the ceiling are beginning to sag. A professional can help you figure out what is causing your sagging ceiling and make the necessary repairs.
Another possible cause of a sagging ceiling is that the builder used the wrong type of drywall when it was put up. While 1/2″ drywall is popular, it isn’t as sturdy as the thicker 5/8″ drywall that professionals use. If the sagging is only in the drywall, then it can usually be repaired with Spackle or joint compound.
If you’re thinking of buying a new home, sagging ceilings are an obvious red flag that you need to have professionally checked out. A building inspector will be able to identify the cause of your sagging ceiling and recommend the best course of action for repair. This will give you peace of mind and the confidence to know that the property is worth the investment. Contact us today to book your pre-purchase inspection!
Mold
Mold is a common problem that results from water damage. It can affect carpet, insulation materials, drywall, and even wallboard, as well as other building materials like wood, metals, paints and fabrics. It typically develops in areas that are damp, dark and warm — the perfect conditions for fungal growth. The first step in removing mold from living areas is to remove all affected materials, and then clean the remaining surfaces with nonphosphate cleaning solutions. Mold spores are airborne and can travel throughout the house, so it’s important to use cleaning methods that do not stir up the spores.
The simplest way to prevent mold is to keep moisture from entering your home or office in the first place. Keeping humidity levels below 50% and ensuring that all pipes, ventilation ducts and other openings are properly sealed can help prevent moisture buildup. It’s also a good idea to keep the temperature in your home below 75 degrees F, as warmer temperatures encourage moisture.
In the event that mold does develop, it’s important to dry all areas and items that have been wet within 24 hours. Using fans and dehumidifiers can help, but the best way to ensure that moisture has been eliminated is to have a professional conduct an indoor air quality evaluation, which will include fungal sampling.
Unlike many types of bacteria, molds do not release toxins or harmful pathogens into the air. They do, however, create musty odors when they grow in moist conditions. The most commonly found molds include aspergillus, cladosporium and stachybotrys chartarum (commonly known as black mold).
These molds are typically not toxic to humans, but they can cause a wide range of symptoms from sore throats to gastrointestinal distress. There have been some reports that toxigenic molds may cause unique or rare health conditions, such as bleeding in the lungs. More research is needed in this area.
Unlocking the Secrets of Medical Spas: A Comprehensive Guide to Rejuvenation and Wellness
In the bustling world of wellness, medical spas have emerged as oases of rejuvenation, blending the serenity of a traditional spa with the expertise of medical professionals. From advanced skincare treatments to innovative anti-aging procedures, medical spas offer a myriad of services designed to enhance both outer beauty and inner well-being. In this comprehensive guide, we delve into the world of medical spas, exploring their offerings, benefits, considerations, and the future trends shaping this rapidly evolving industry. Click the Medical Spa Seo to know more.
Understanding Medical Spas

Medical spas, often referred to as medspas, are establishments that bridge the gap between traditional spas and medical clinics. Unlike conventional spas, which focus primarily on relaxation and pampering, medical spas offer a wide range of cosmetic treatments and therapeutic services under the supervision of licensed medical professionals. This unique fusion of medical expertise and spa luxury creates an environment where clients can address their aesthetic concerns while indulging in self-care and relaxation.
Services Offered
The hallmark of a medical spa is its diverse array of services, which may include:
- Cosmetic Injectables: Botox, dermal fillers, and other injectable treatments are administered by skilled practitioners to reduce wrinkles, restore volume, and enhance facial contours.
- Laser Treatments: Utilizing state-of-the-art laser technology, medical spas offer treatments such as laser hair removal, skin resurfacing, and photofacials to address a variety of skin concerns with precision and efficiency.
- Medical-Grade Skincare: Customized skincare regimens incorporating pharmaceutical-grade products and advanced treatments help clients achieve healthier, more radiant skin.
- Body Contouring: Non-invasive body sculpting procedures like CoolSculpting and radiofrequency therapy target stubborn fat deposits and tighten skin without the need for surgery.
- Wellness Services: Many medical spas offer holistic wellness services such as acupuncture, nutritional counseling, and IV therapy to promote overall health and vitality.
Benefits of Visiting a Medical Spa
The appeal of medical spas lies in their ability to offer comprehensive solutions to a wide range of aesthetic concerns. Some of the key benefits of visiting a medical spa include:
- Expertise and Safety: Medical spas are staffed by licensed medical professionals who undergo rigorous training in aesthetic medicine, ensuring that treatments are administered safely and effectively.
- Advanced Treatments: Medical spas utilize cutting-edge technology and medical-grade products to deliver superior results compared to traditional spa treatments.
- Customized Solutions: Each client receives personalized care and treatment plans tailored to their unique needs and goals, ensuring optimal outcomes.
- Holistic Approach: Medical spas emphasize a holistic approach to wellness, addressing both physical and emotional well-being through a combination of medical treatments and spa therapies.
- Long-Term Results: Many treatments offered at medical spas produce long-lasting results, allowing clients to maintain their youthful appearance and vitality over time.
Considerations When Choosing a Medical Spa
When selecting a medical spa, it’s essential to consider several factors to ensure a safe and satisfying experience:
- Credentials and Reputation: Choose a medical spa that is reputable and staffed by licensed medical professionals with specialized training in aesthetic medicine.
- Safety Protocols: Verify that the medical spa adheres to strict safety protocols and maintains a clean and hygienic environment to minimize the risk of complications.
- Client Reviews and Testimonials: Read reviews and testimonials from previous clients to gauge the quality of the medical spa’s services and customer satisfaction.
- Consultation Process: A reputable medical spa will offer thorough consultations to assess your goals, discuss treatment options, and address any concerns before proceeding with a procedure.
- Technology and Equipment: Look for a medical spa that invests in the latest technology and equipment to ensure optimal results and minimize discomfort during treatments.
The Future of Medical Spas
As the demand for holistic wellness services continues to grow, medical spas are poised to play an increasingly prominent role in the healthcare landscape. Several trends are expected to shape the future of the industry:
- Integration of Technology: Medical spas will increasingly incorporate technology such as artificial intelligence and virtual reality to enhance the client experience and customize treatment plans.
- Focus on Preventative Care: There will be a growing emphasis on preventative skincare and wellness services aimed at preserving youthfulness and addressing aging concerns before they become apparent.
- Expansion of Male-Focused Services: With the rising demand for cosmetic treatments among men, medical spas will expand their offerings to cater to the specific needs and preferences of male clients.
- Sustainable Practices: Medical spas will adopt eco-friendly practices and sustainable skincare products to align with the growing awareness of environmental issues among consumers.
- Telemedicine and Remote Consultations: The use of telemedicine and virtual consultations will become more widespread, allowing clients to access medical advice and treatment recommendations from the comfort of their own homes.
Medical spas represent a harmonious fusion of medical expertise, advanced technology, and spa luxury, offering a holistic approach to wellness that addresses both aesthetic concerns and underlying health issues. With their emphasis on safety, effectiveness, and personalized care, medical spas have become essential destinations for individuals seeking to enhance their appearance and improve their overall well-being. By staying at the forefront of innovation and embracing emerging trends, medical spas are poised to continue flourishing as beacons of modern wellness in the years to come.
Services Offered
One of the defining features of medical spas is their comprehensive menu of services, which cater to a diverse range of aesthetic and wellness needs. Some of the most common services offered at medical spas include:
- Cosmetic Injectables: Botox, dermal fillers, and other injectable treatments are administered by licensed medical professionals to reduce wrinkles, restore facial volume, and enhance overall facial aesthetics.
- Laser Treatments: Utilizing advanced laser technology, medical spas offer a variety of laser-based treatments, including hair removal, skin resurfacing, vein therapy, and tattoo removal.
- Medical-Grade Skincare: Tailored skincare regimens incorporating medical-grade products and advanced treatments are designed to address specific skin concerns such as acne, hyperpigmentation, and aging.
- Body Contouring: Non-invasive body sculpting procedures like CoolSculpting and radiofrequency therapy help clients achieve a more toned and sculpted physique without the need for surgery.
- Holistic Wellness Services: Many medical spas offer holistic wellness services such as acupuncture, nutritional counseling, IV therapy, and stress management techniques to promote overall health and vitality.
Benefits of Visiting a Medical Spa
The appeal of medical spas lies in their ability to offer a holistic approach to wellness that addresses both physical appearance and emotional well-being. Some of the key benefits of visiting a medical spa include:
- Expertise and Safety: Medical spas are staffed by licensed medical professionals who have undergone specialized training in aesthetic medicine, ensuring that treatments are administered safely and effectively.
- Advanced Treatments: Medical spas utilize state-of-the-art technology and medical-grade products to deliver superior results compared to traditional spa treatments.
- Personalized Care: Each client receives personalized care and treatment plans tailored to their unique needs and goals, maximizing the efficacy of the services rendered.
- Long-Term Results: Many treatments offered at medical spas produce long-lasting results, allowing clients to maintain their youthful appearance and vitality over time.
- Holistic Approach: Medical spas emphasize a holistic approach to wellness, addressing both physical and emotional well-being through a combination of medical treatments and spa therapies.
Considerations When Choosing a Medical Spa
When selecting a medical spa, it’s essential to consider several factors to ensure a safe and satisfying experience:
- Credentials and Reputation: Choose a medical spa that is reputable and staffed by licensed medical professionals with specialized training in aesthetic medicine.
- Safety Protocols: Verify that the medical spa adheres to strict safety protocols and maintains a clean and hygienic environment to minimize the risk of complications.
- Client Reviews and Testimonials: Read reviews and testimonials from previous clients to gauge the quality of the medical spa’s services and customer satisfaction.
- Consultation Process: A reputable medical spa will offer thorough consultations to assess your goals, discuss treatment options, and address any concerns before proceeding with a procedure.
- Technology and Equipment: Look for a medical spa that invests in the latest technology and equipment to ensure optimal results and minimize discomfort during treatments.
Window Tinting – Why Quality Matters
When choosing Pro Window Tinting Wichita quality counts. Low-quality tints fade quickly, look cheap and are more prone to shattering when hit by rocks or even seagulls (if you’re that guy).

Choose a tint that blocks UV rays and reduces glare without killing visibility. Carbon tints offer great UV reduction and are fade-resistant, durable and won’t interfere with GPS, radio or cellular signals.
Harmful UV rays that penetrate through windows are responsible for the fading and discoloration of upholstery, leather seats, and dashboards. Window tint offers protection to you and your passengers by blocking up to 99% of these rays. This protection can help preserve the value of your car and extend its lifespan.
Window tint also protects your skin from the damaging effects of UV rays. UV rays penetrate the skin on a cellular level and can cause premature aging, hyperpigmentation, sunburns, and skin cancer. The UV protection offered by tinting your windows is important, especially when you have children that spend a lot of time outside.
While your windshield does a decent job of blocking UV radiation, your side and rear windows offer significantly less protection. UV-blocking tints can save you money on auto repair bills and protect your family from skin diseases and other health problems.
There are several different types of tint available, including dyed, metalized, carbon, and ceramic. Each tint has its own characteristics and benefits. Dyed tints sandwich pigment between an adhesive layer and an outer protective coating. They are the most affordable option, but they offer less UV protection than other types of tint. Additionally, they tend to fade and can turn a purple hue over time. Metalized and carbon tints contain tiny particles that reflect UV rays and reduce heat. These tints are more expensive than dyed tints, but they are sturdier and more effective at protecting you from harmful UV radiation. Additionally, they don’t interfere with radio and mobile signals.
Ceramic tints are the best option when it comes to protecting your vehicle from UV rays. They are sturdier than other tints and offer up to 99% UV protection. In addition to protecting you and your passengers, this type of tint will keep the interior of your vehicle cooler by reducing the amount of solar energy that is transmitted through the glass. This will reduce the need for air conditioning and can lead to fuel savings and reduced greenhouse gas emissions.
Besides protecting you and your passengers from UV radiation, window tints can improve the look of your car and can even prevent it from being stolen. This is because tinted windows are difficult to remove by thieves, making it more likely that your vehicle will be returned if it is ever stolen.
Increased Visibility
Window tint is available in a wide range of darknesses, but it’s important to note that each state has its own regulations about the amount of light that can pass through windows. You’ll want to make sure that your tint is legal by looking for the “/” symbol that indicates that the glass meets state standards.
In addition to protecting you and your family from harmful UV rays, tinted windows help to regulate the indoor temperature. Traditional windows allow sunlight and heat to penetrate the interior, but tinted windows block much of this energy, resulting in lower heating and air conditioning costs.
Tint can also reduce glare, which is especially helpful when driving. It’s easy to lose focus when driving when the sun is shining on the road or reflecting off wet roads, buildings, or other vehicles. Even a very light tint shade can significantly reduce glare, making your drive safer and more comfortable.
Whether you have your car’s factory window tint or are getting window tint applied at home, most films contain a reflective coating that helps to cut down on glare. In fact, some tint shades are nearly mirror-like in appearance. In addition to reducing glare, these reflective coatings can keep the interior of your car cooler in hot weather and protect the interior materials from fading.
The same reflective properties found in window tinting films can also be beneficial for homeowners and businesses. They can be used to limit the amount of sunlight and heat that enters a building, keeping it cool and bright. The films can also be frosted or textured, adding privacy to a room while still letting in natural light.
In addition to providing privacy, security film offers protection from smash-and-grab burglaries and can hold shattered glass together in the event of an accident or disaster. This makes it difficult for criminals to break into a vehicle or home through the windows and can deter them from attempting it altogether. Window tint is also more durable than glass, meaning it will last longer and require less maintenance.
Increased Privacy
Window tinting involves applying a clear or tinted film to a home or vehicle window that reduces UV rays, heat, and glare. It is an easy and affordable way to add an attractive look to a home or car while also increasing privacy and energy efficiency. Many window tints also boost curb appeal and can qualify for tax deductions.
Glare can be distracting and even dangerous, particularly when driving. It’s caused by direct sunlight, but can also be reflected off of wet roads or buildings. Tinted windows significantly reduce glare, making it easier to watch television or read a book at home and make it safer to drive on bright days.
Window tint and film can also make it difficult for passersby to see what’s inside your vehicle, which can help deter thieves from breaking into your car. This is especially helpful if you have valuables, such as expensive electronics, left in the back of your vehicle. Window tint also prevents people from seeing what is in your refrigerator or freezer, which can deter robberies that involve picking up food items on the way home.
Security window tint can be used to create shatter resistant windows, which can hold together in case of a break and keep glass from scattering all over the place during an earthquake or other natural disaster. This type of tint is available in both frosted and clear styles, and can help protect you and your family from flying debris while preserving the beauty of your windows.
The right window tint will be a good fit for your specific needs, so you’ll want to consult with a professional. They will be able to recommend the best options for you based on the amount of privacy and light regulation that you require, as well as your budget. They can also advise you on the type of tint that will work best with your existing windows, including if they are double-paned or single-paned.
It is important to note that window tinting will likely void your window warranty, so it’s best to have the work done by professionals to ensure quality and long-term performance. In addition, DIY window tinting kits, tools and tutorials are readily available to homeowners, but can be damaging if not applied properly or with the right type of window film.
Shatter Resistance
Window tints run the gamut from inexpensive to hella pricey and, like most things, you get what you pay for. Cheap film will often be of poor quality, forming bubbles, ripples and rips that obscure your view. It’s also prone to melting or flaking. You can avoid these issues by getting a professionally installed high-quality tint from a certified installer.
Window Tinting blocks UV rays and heat, keeping your car’s interior cooler. This saves you money on gas and keeps your seatbelt buckles from burning hot. It also reduces the amount of energy required to operate your air conditioning, saving you on your power bill.
There are many types of tint, ranging from dark to clear. The darker the tint, the more privacy and UV ray protection it offers. The type of window tint you choose depends on your needs and the laws in your area. It’s important to read up on what your state’s laws say regarding window tint percentages before applying the film yourself. Otherwise, you may end up with a darker tint than you intended and be in violation of the law.
You can buy tint that has a dark appearance and provides the benefits of privacy, UV protection, and heat rejection without going over the legal limit. This is called “factory tint.” It’s applied during the manufacturing process by coating the glass with a dark pigment. It doesn’t offer the same level of UV protection or heat rejection as tinted films do.
Home window tinting is a great deterrent for burglars. It blocks their view of your valuables and prevents the glass from shattering after a smash-and-grab burglary. Window tint can also be used to keep glare from reflecting off your television and computer screens, making them easier to watch.
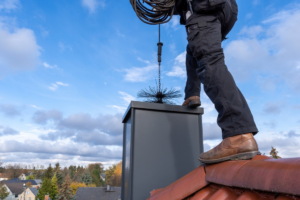
The Importance of Chimney Cleaning
Keeping your chimney clean is a vital home maintenance task that’s easily overlooked. The simple hand broom Dick Van Dyke used is no longer sufficient; instead, you need to invest in the right tools.
One method involves climbing on the roof and using a rod system with ropes. The other uses a double-line system that allows you to scrub the chimney from inside your fireplace opening without having to climb on the roof. Contact Chimney Cleaning Baltimore now!
Creosote is a dark, sticky byproduct of burning wood that forms when vaporized gases and particulates condense on the inner walls of your chimney and flue. When too much creosote builds up, it can restrict the flow of hot gases and pose a dangerous hazard. During your chimney inspection, a professional can determine how much creosote has built up in your chimney and recommend the best course of action.
When fires burn, they emit gases that cool down as they rise through the chimney and flue. These cooled gases combine with water and other chemicals to form the dark, flaky creosote that is so often seen in fireplaces.
In ideal conditions, first degree creosote forms in loose, soot-like flakes that can be easily removed with a chimney brush. Second degree creosote is a little more challenging, as it looks like shiny black flakes similar to dry corn or tar. It will form where the flue temperature is cooler than normal, such as in wood stoves and fireplaces with glass doors.
As it dries, second degree creosote can form hardened coatings that are difficult to remove. If left untreated, this creosote can lead to a chimney fire that eats through the lining of your chimney and can also cause a chimney leak.
Third degree creosote is the most hazardous as it resembles a tar-like substance and can build up to an inch thick. This is typically what is found in chimneys that have experienced a chimney fire. When this creosote reaches the chimney flue, it can ignite anything combustible within its reach, including the home’s framing and other structures.
Chimney fires can also damage your chimney lining and leave behind a toxic gas known as carbon monoxide. Carbon monoxide is odorless, colorless and tasteless, making it impossible for homeowners to know when they’re breathing in dangerous levels of the chemical. Inhaling this fume can make you nauseous and dizzy, and long-term exposure can be deadly. Chimney sweeps can help prevent these dangers by scheduling regular chimney cleaning services, which will reduce the amount of creosote in your flue.
Damaged Chimney Lining
Chimney liners (also known as flue liners) are responsible for protecting the walls of your chimney from extreme heat and corrosive byproducts of burning fuel. Without a functioning chimney liner, soot and creosote would quickly deteriorate the masonry of your fireplace. A chimney liner is also important for allowing a strong and consistent draught to vent gases and smoke out of your home. If your chimney liner is damaged, it may be time to call for repairs.
If you notice that bits of broken masonry are dropping into your firebox, it is likely that your chimney liner is crumbling or even falling apart. This is a dangerous situation because your chimney could suddenly start to leak harmful gases into your living space. These gases include carbon monoxide, which is odorless and tasteless but can be deadly in high concentrations.
Damaged chimney liners are often caused by poor design or construction. Chimneys built from cheap materials can deteriorate more rapidly than those made of durable materials, such as concrete or masonry. Additionally, a chimney can be over-sized for the type of fireplace it is serving, which can cause a build-up of hot gases in the flue.
Chimneys with clay flue tiles can easily develop cracks or gaps in their seams. These cracks and gaps allow dangerous fumes to escape into your fireplace, which can clog your chimney and pose a health hazard for your family.
A damaged chimney lining can lead to other problems as well, including less efficient burning and a higher risk of chimney fires. It is important to schedule routine inspections with a professional chimney sweep to ensure your chimney is in peak working condition.
If you believe your chimney lining is in danger of damage, call for a professional chimney inspection today. Our experienced chimney professionals can diagnose the problem and recommend a solution that best fits your needs. We provide both masonry repair and replacement services for older chimneys with clay flue tiles, as well as for newer chimneys that have a metal liner. Stainless steel flue liners are durable and corrosion-resistant, which means they will last longer than clay liners and require fewer repairs over the years.
Smoke Detection
Chimney sweeps are trained to understand the principles of fire prevention. They also follow specific guidelines and procedures that ensure a clean, professional job every time. They use specialized tools to scrape creosote off the lining of the chimney flue, and they remove all the debris from the fireplace and mantelpiece before leaving your home. Chimney sweeps also inspect the flue for cracks, deterioration and other problems that can affect safety.
A dirty chimney can be a fire hazard and lead to health issues. For example, creosote is a highly flammable fire byproduct that can build up to an eighth of an inch thick and block the chimney’s ability to exhaust smoke. This can lead to a chimney fire that could spread from the flue to the combustible parts of the home. Chimney fires can also produce carbon monoxide, which is toxic and can poison a household.
Dirty chimneys often have a crack in the flue that allows carbon monoxide to enter the home. These cracks can also allow water to leak into the chimney system, corroding important components and making it more difficult for smoke to escape.
Another dangerous problem found in many homes is the presence of pests like birds, squirrels and raccoons. These animals often build nests inside chimneys using flammable materials like twigs and insulation. A chimney with a bird or rodent infestation needs to be cleaned regularly to reduce the risk of disease and fire.
A chimney that isn’t used for several months will probably have a lot of soot and creosote buildup. The chimney may need to be cleaned completely before the homeowners can safely relight the fireplace. Before a chimney can be reopened, it should undergo a Level One Inspection to verify that it’s structurally sound and ready for use.
Safety
Chimneys are an important part of many homes. They provide warmth, comfort and that unmistakable cozy ambiance, but they can also be dangerous if neglected. Over time, soot and creosote buildup can cause chimney fires and carbon monoxide leaks. To prevent these hazards, it is crucial to have your chimney regularly inspected and cleaned. In this blog post, we will discuss the importance of chimney cleaning, the common safety issues that may arise, and tips to help ensure your chimney is in good condition.
When a chimney is dirty, it’s best to have it cleaned right away. Professionals use a variety of tools to scrape the accumulated soot and creosote off the chimney lining. However, the cleaning process can be messy, and debris can fall onto furniture, floors and other surfaces. To protect these areas, it’s best to cover them with tarps or drop cloths before the technician begins cleaning. Also, be sure to open all windows and doors in the room where the chimney is being cleaned, so that the fumes and dust can escape.
Another important chimney safety tip is to use proper fuel practices. Avoid burning wet or unseasoned wood, as this can lead to excessive creosote buildup. Also, it’s a good idea to keep a chimney cap in place, which will prevent animals, leaves and other debris from entering the system. This will also help reduce the amount of soot that is produced.
Finally, it’s important to have a smoke detector near the fireplace. This will alert you to any leaking carbon monoxide, which can be deadly if not detected quickly. It’s also a good idea to have a functioning fire extinguisher nearby in case of a fire.
In summary, the most important chimney safety tip is to have your chimney inspected and cleaned regularly. Professionals can identify potential problems, and they have the knowledge and experience to adhere to industry standards for ventilation, fire prevention and carbon monoxide detection. Following these simple tips will help ensure that your chimney is in good working condition and keeps you and your family safe.